Go to Metafield Configuration and click "Add Metafield" under product.
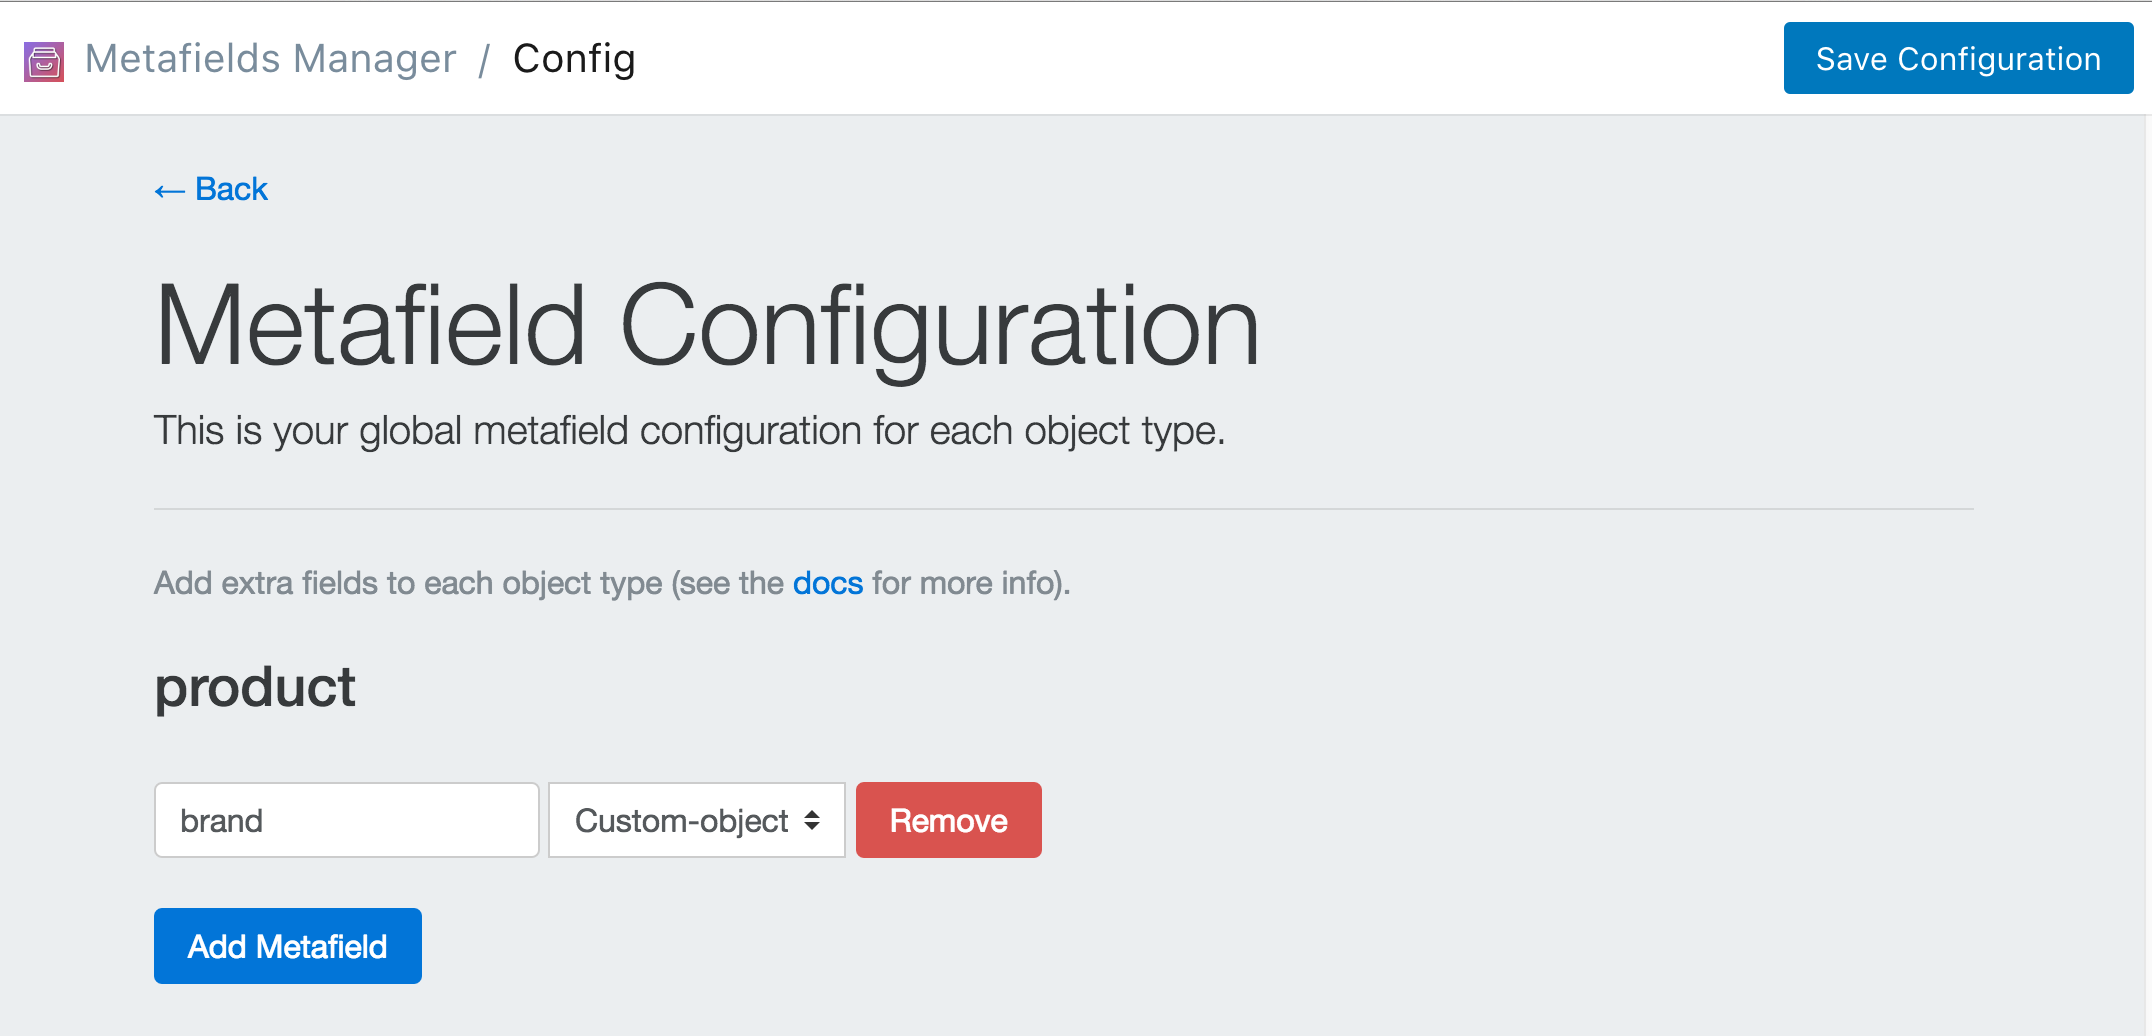
Enter "brand" for metafield handle, then select "Custom-object" from the dropdown menu. This will link to our "Brand" custom object that we are about to create. Your configuration should look similar to the screenshot below:
Click Save Configuration and click Go Back to Homepage.
Click Edit your Custom Object Configurations then click Create a new Object Type.
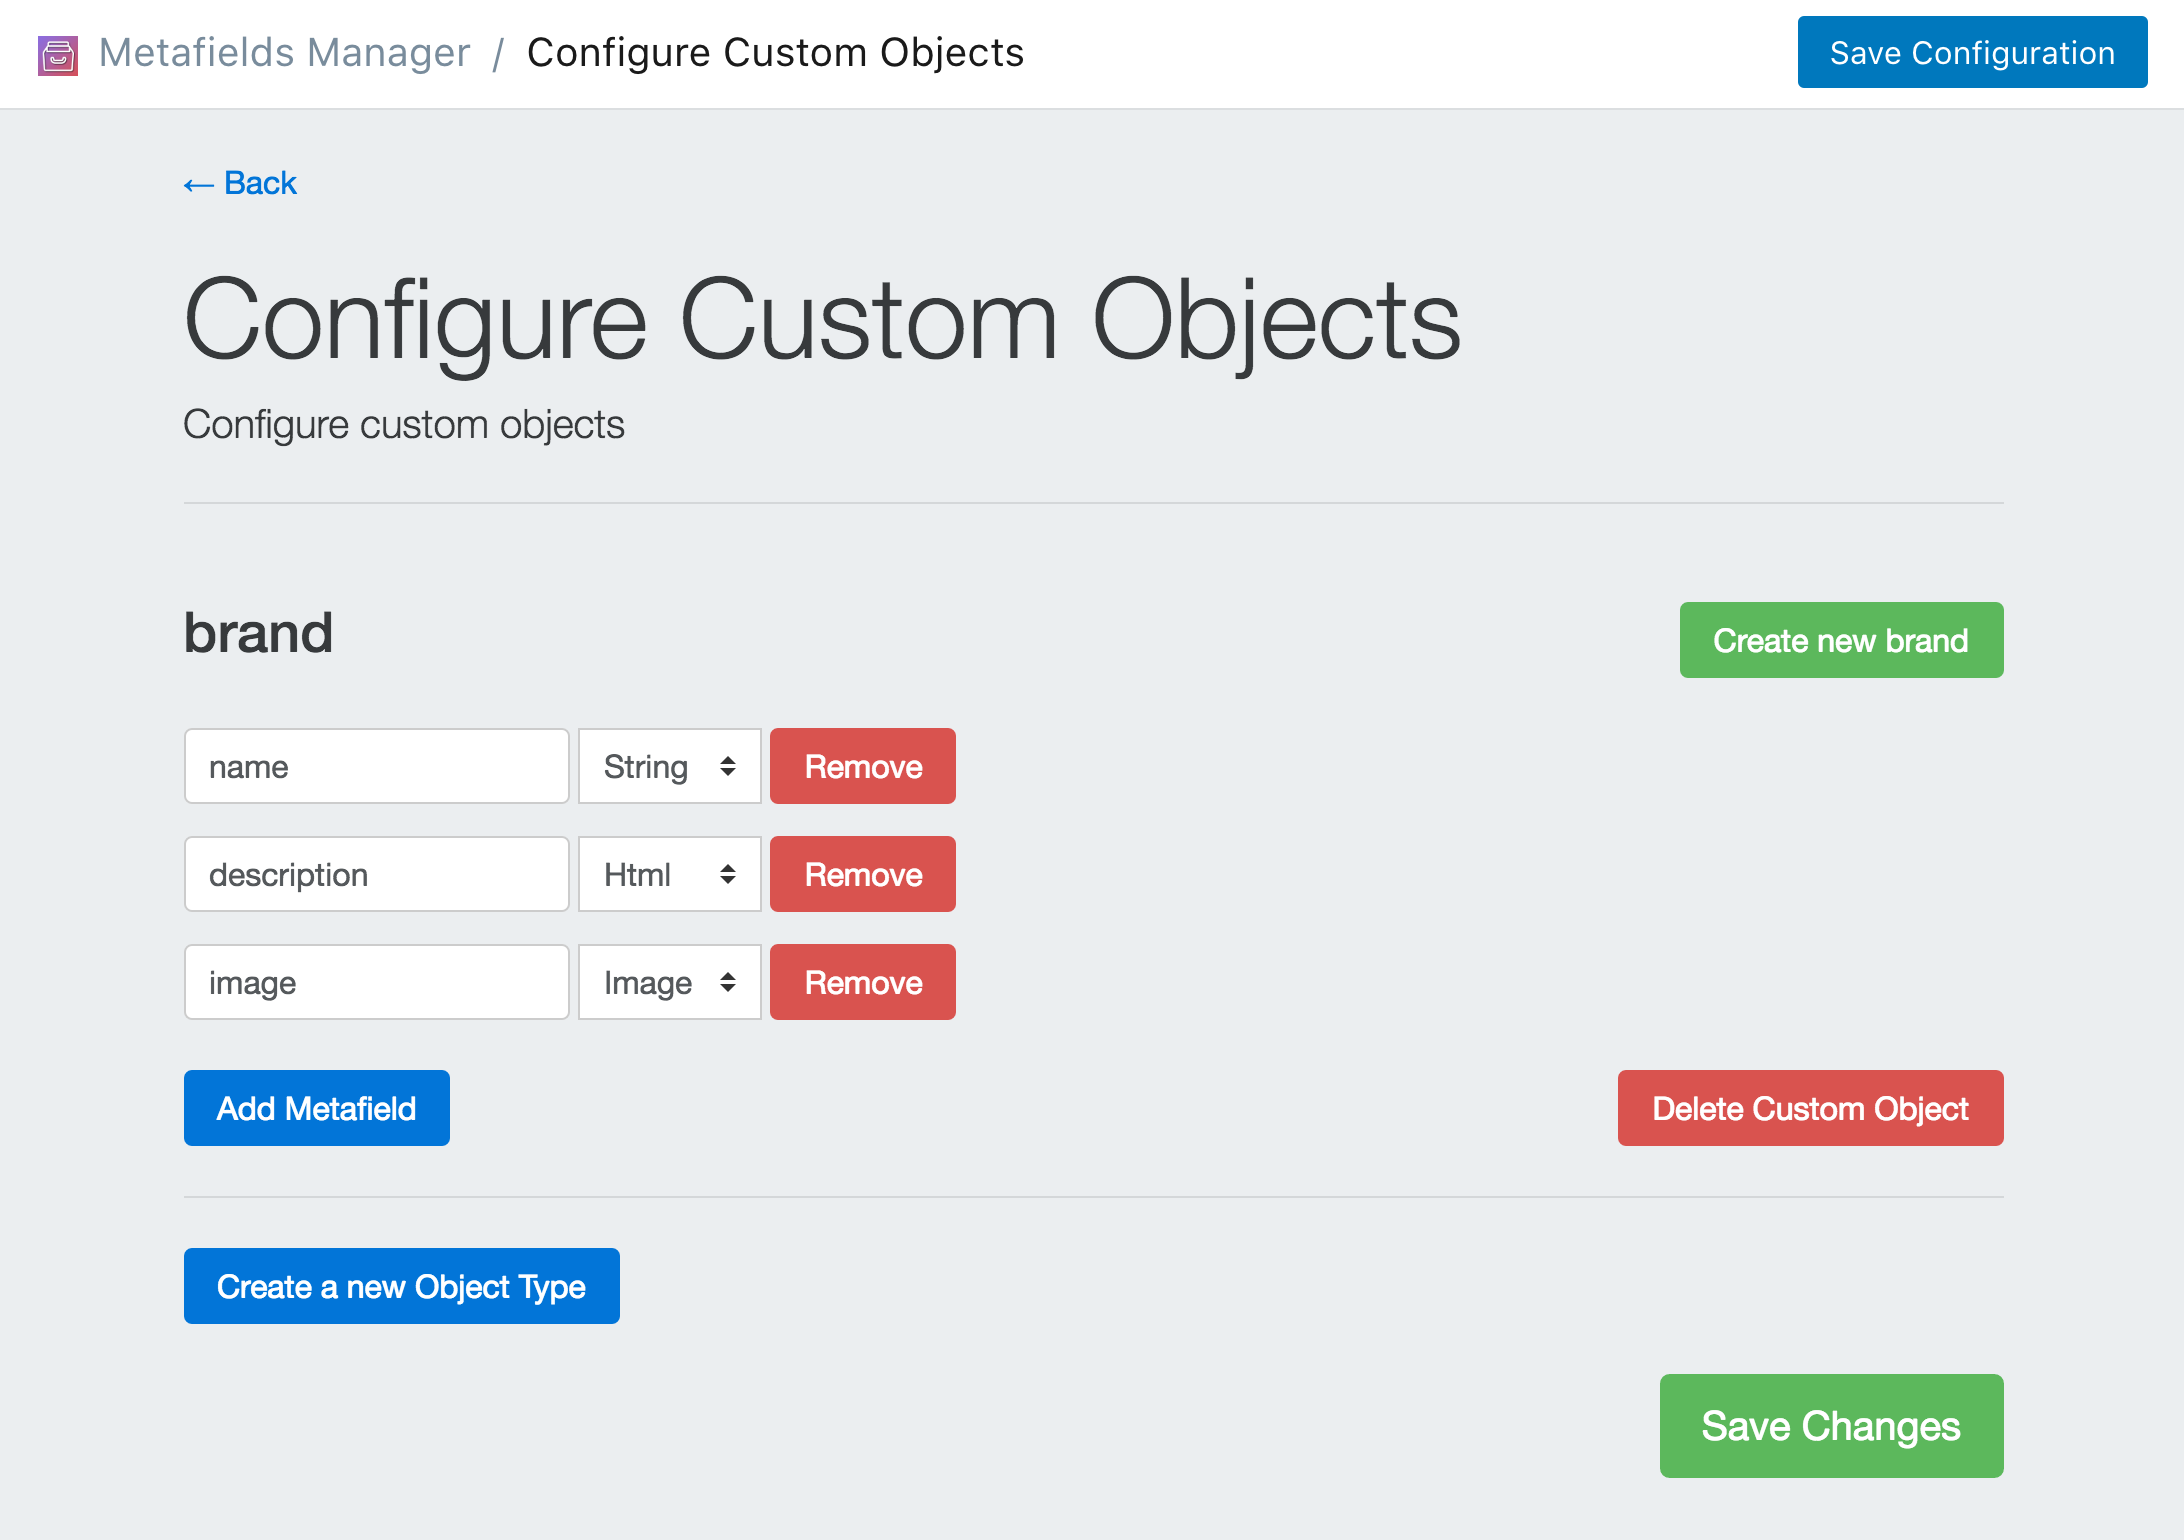
Enter "brand" for the custom object handle. Click Add Metafield three times. Then enter "name" with type "string" for the first entry, "description" with type "html" for the second entry and "image" of type "Image" for the third entry. Once you're done, click Save Changes.
Obviously you can use different fields to suit your business needs- but for the sake of this example we will stick with these three.
Your configuration should look like the image below:
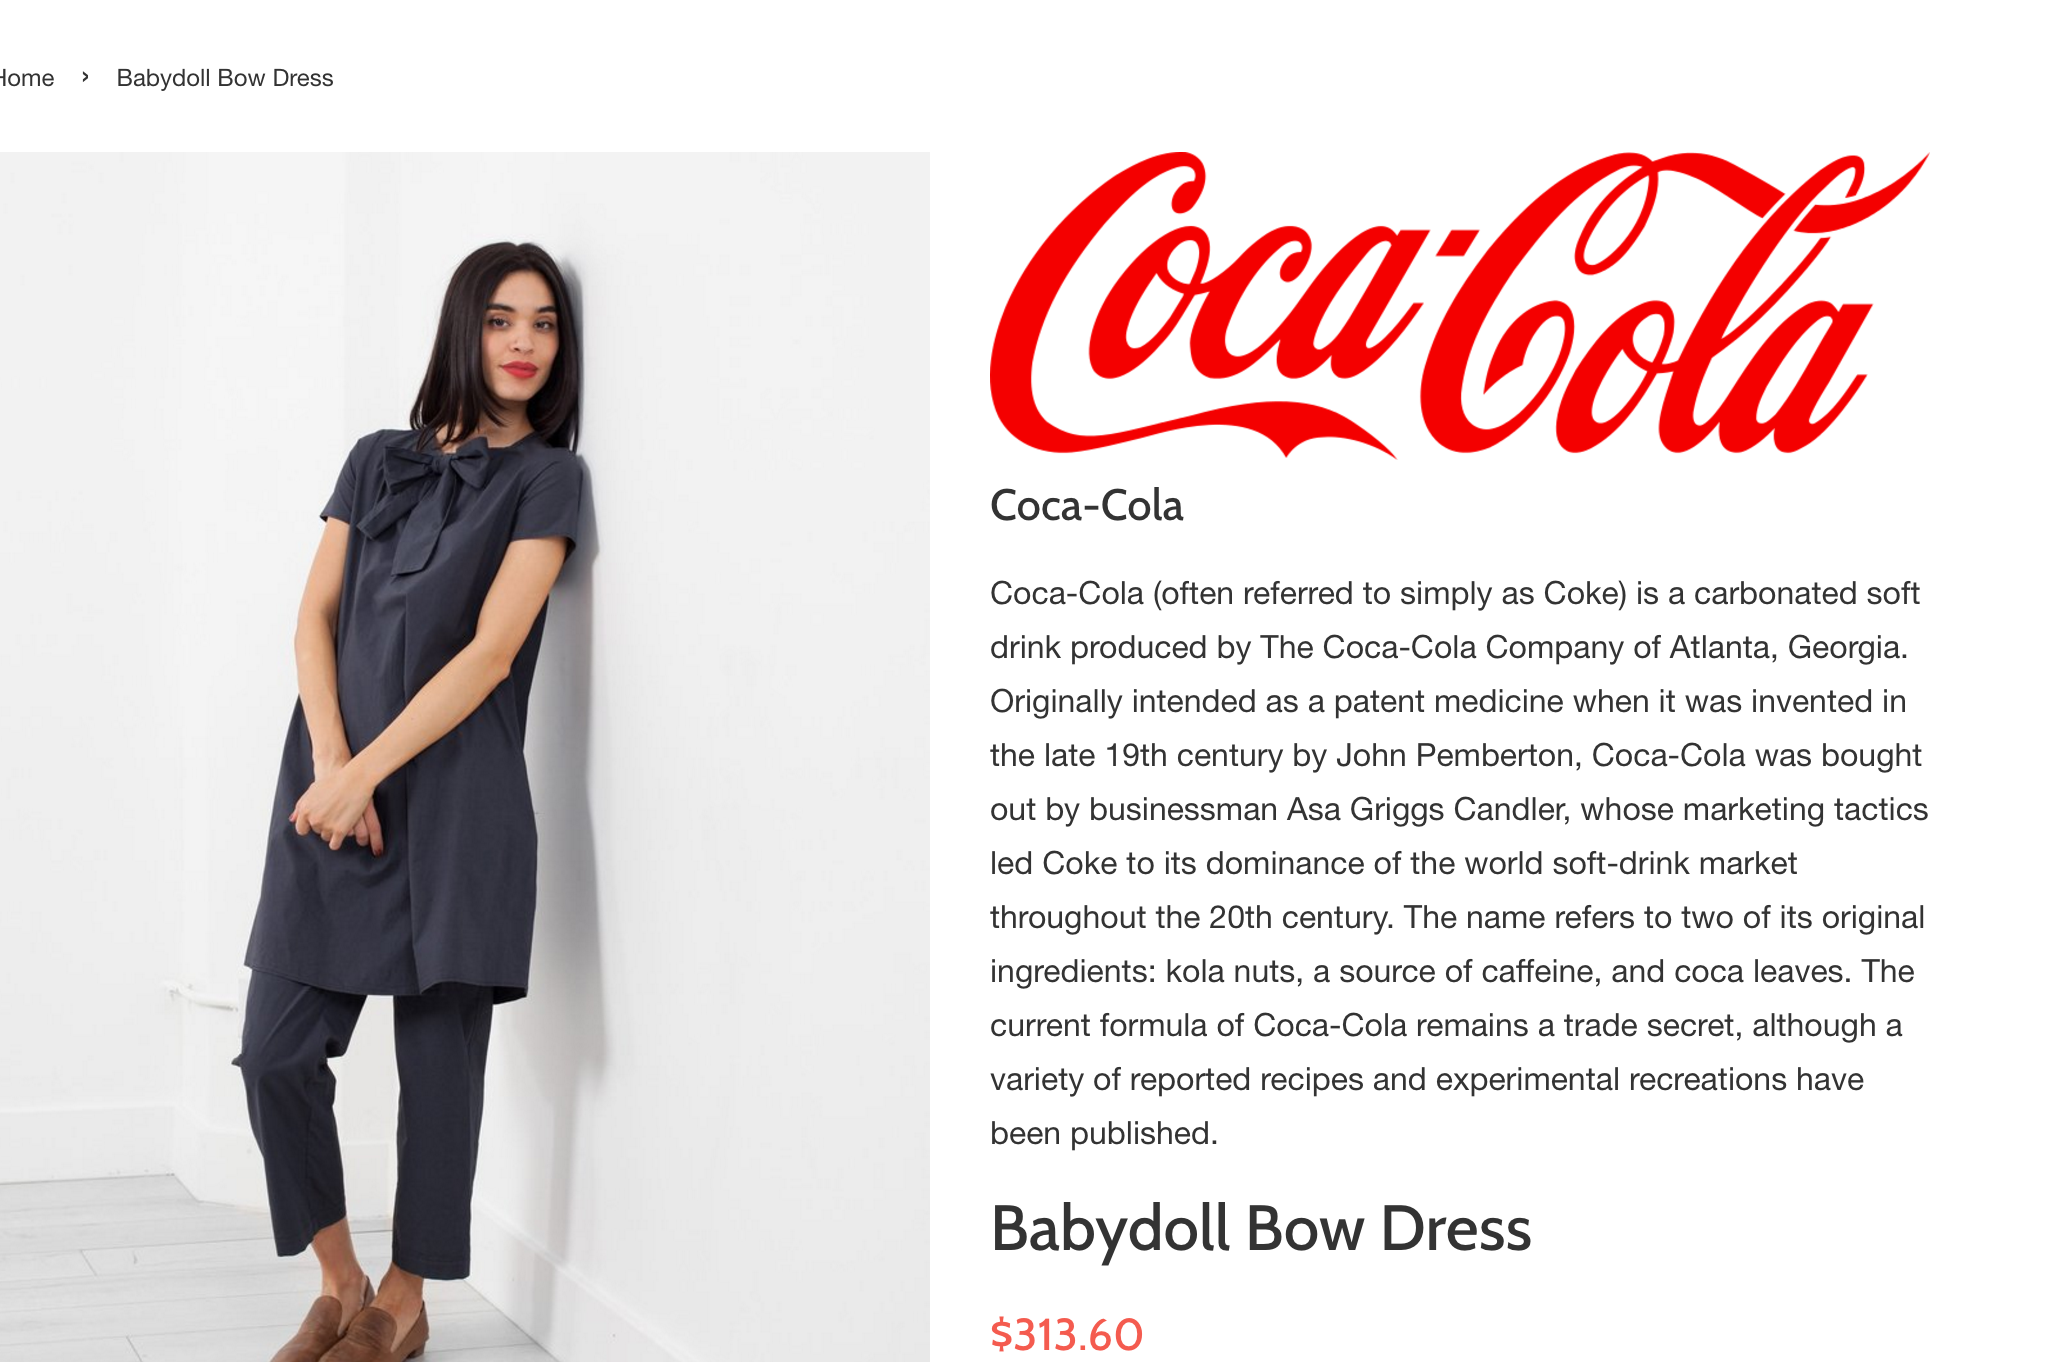
Now that you defined the structure of your "brand" custom object it's time to create an instance of it. Go back to the app homepage, click Create/Modify Custom Objects, then click Create New Brand under type "brand". Now you are on the "brand" creation page. We simply need to fill out the fields, and then click Save Changes.
Once complete, your brand page should look like the image below:
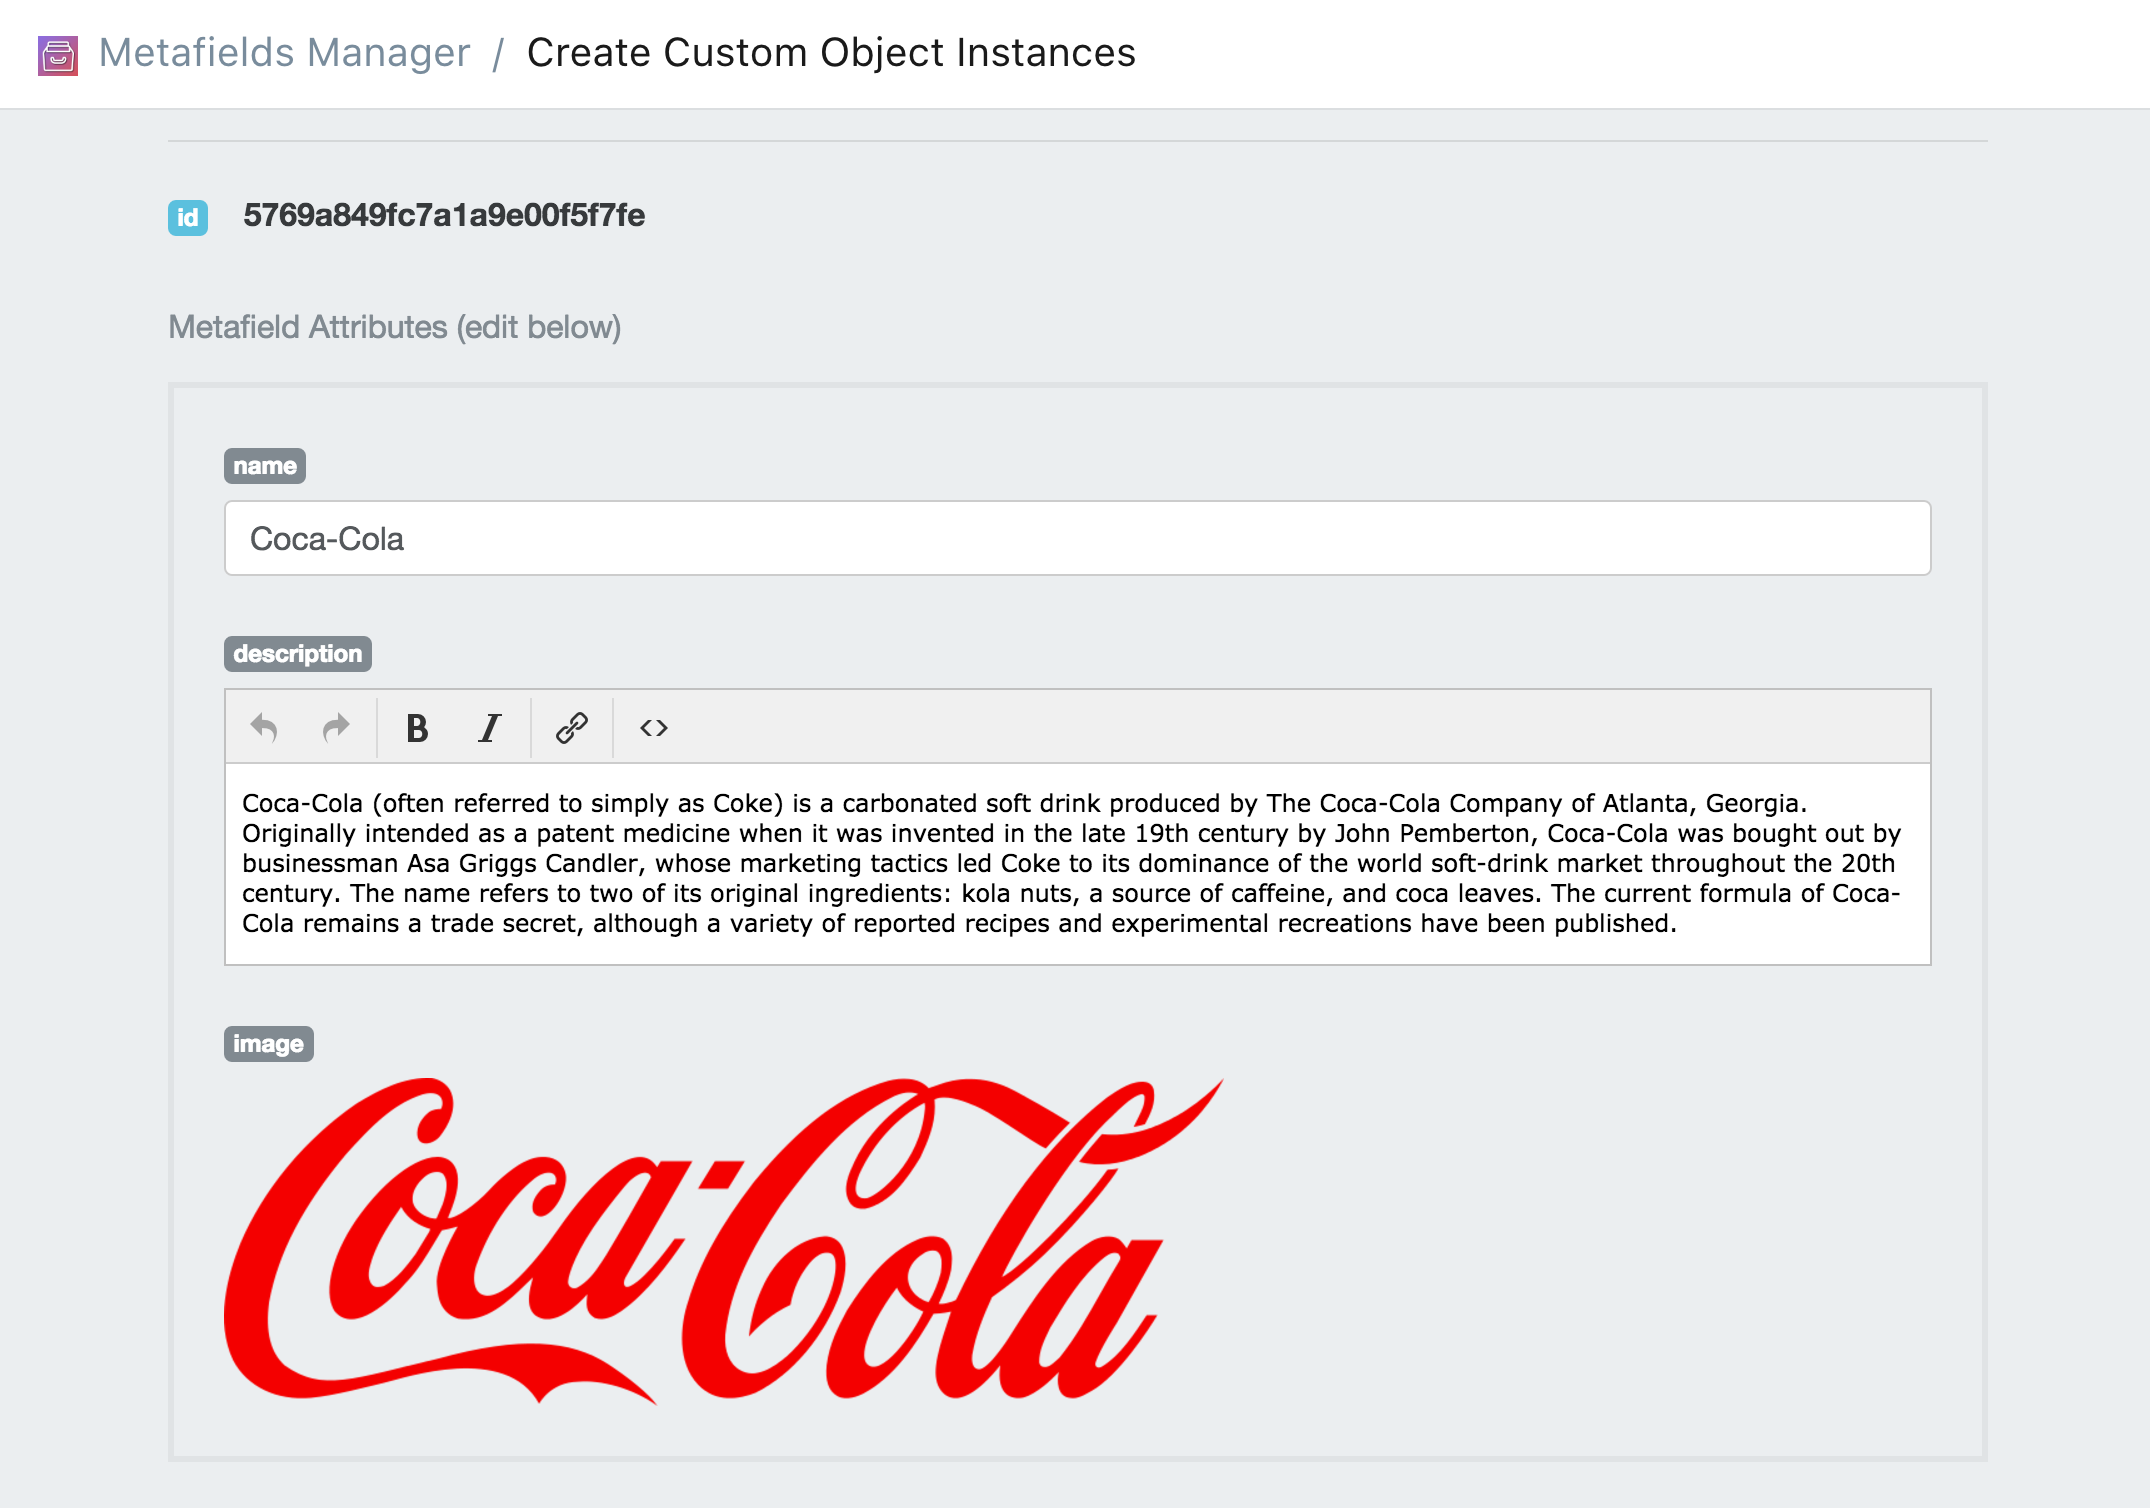
Once you clicked save. Copy the id located at the top of the page next to the blue "id" label. You will use this id to link the custom object to your product or products.
Find the product you want to add metafields to. You can do this in 2 different ways.
One way is through the metafields app. Click on Add Metafields. Then select Product from the dropdown menu and click Search.
The other way is through the Shopify dashboard. Navigate the product as you normally would through the shopify dashboard (click Products find the product you want to edit and click the link.). Once you're on the product page in the Shopify dashboard, click the "..." button on the top right and select Add Metafields to Product.

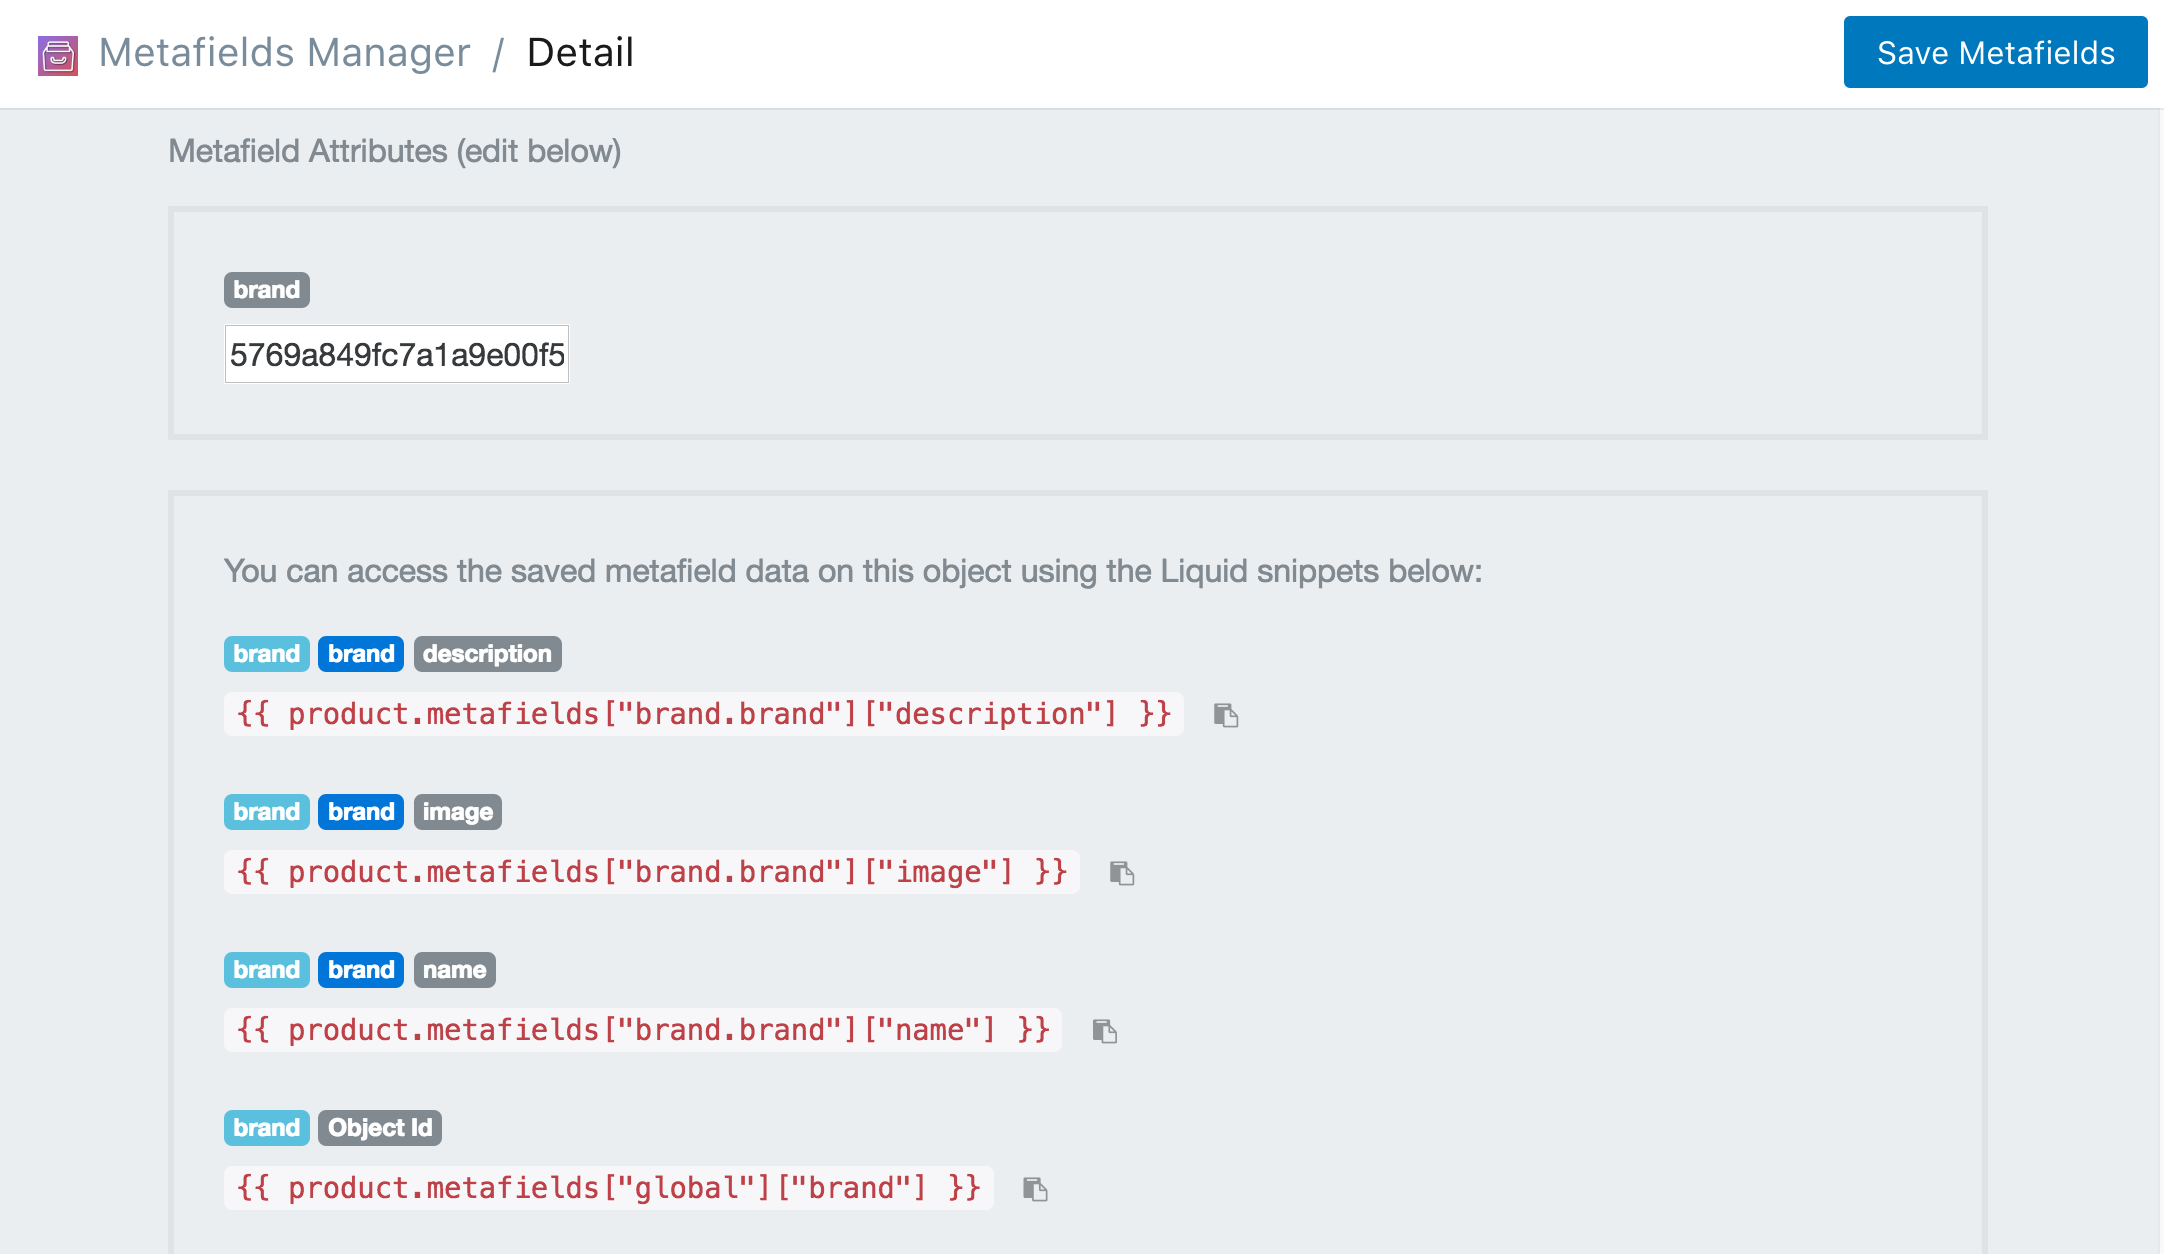
Once you've navigated to the product that you want to add metafields to, you simply paste the id for the brand you want to display on this particular product. Then click Save Metafields.
You now 4 extra data fields attached to this product. They are the name of the brand, the description of the brand, the image of the brand, and the id of the brand.
Now that you have the data set up. You can create the .liquid snippet that will display the brand. You can download the .liquid code snippet here. Be sure to include the snippet on your product.liquid template by adding this line:
{% include "mm-brand" %}
Or view the snippet below:
When it's all finished. Your should have a brand object attached to your product. It will look similar to the image below.
The great thing about custom objects is that you can associate them to many different products- so you don't have to copy paste over and over. Additionally, you can update a custom object once and the changes will be applied to all the products that are associated with it.