Note: This tutorial will explain how to add several generic metafields and associate them with different articles. The metafields will have one of each data type in order to show you the possibilities of the Metafields Manager app. You should tailor your metafields to satisfy your business needs and use this as a reference instead of a step by step example.
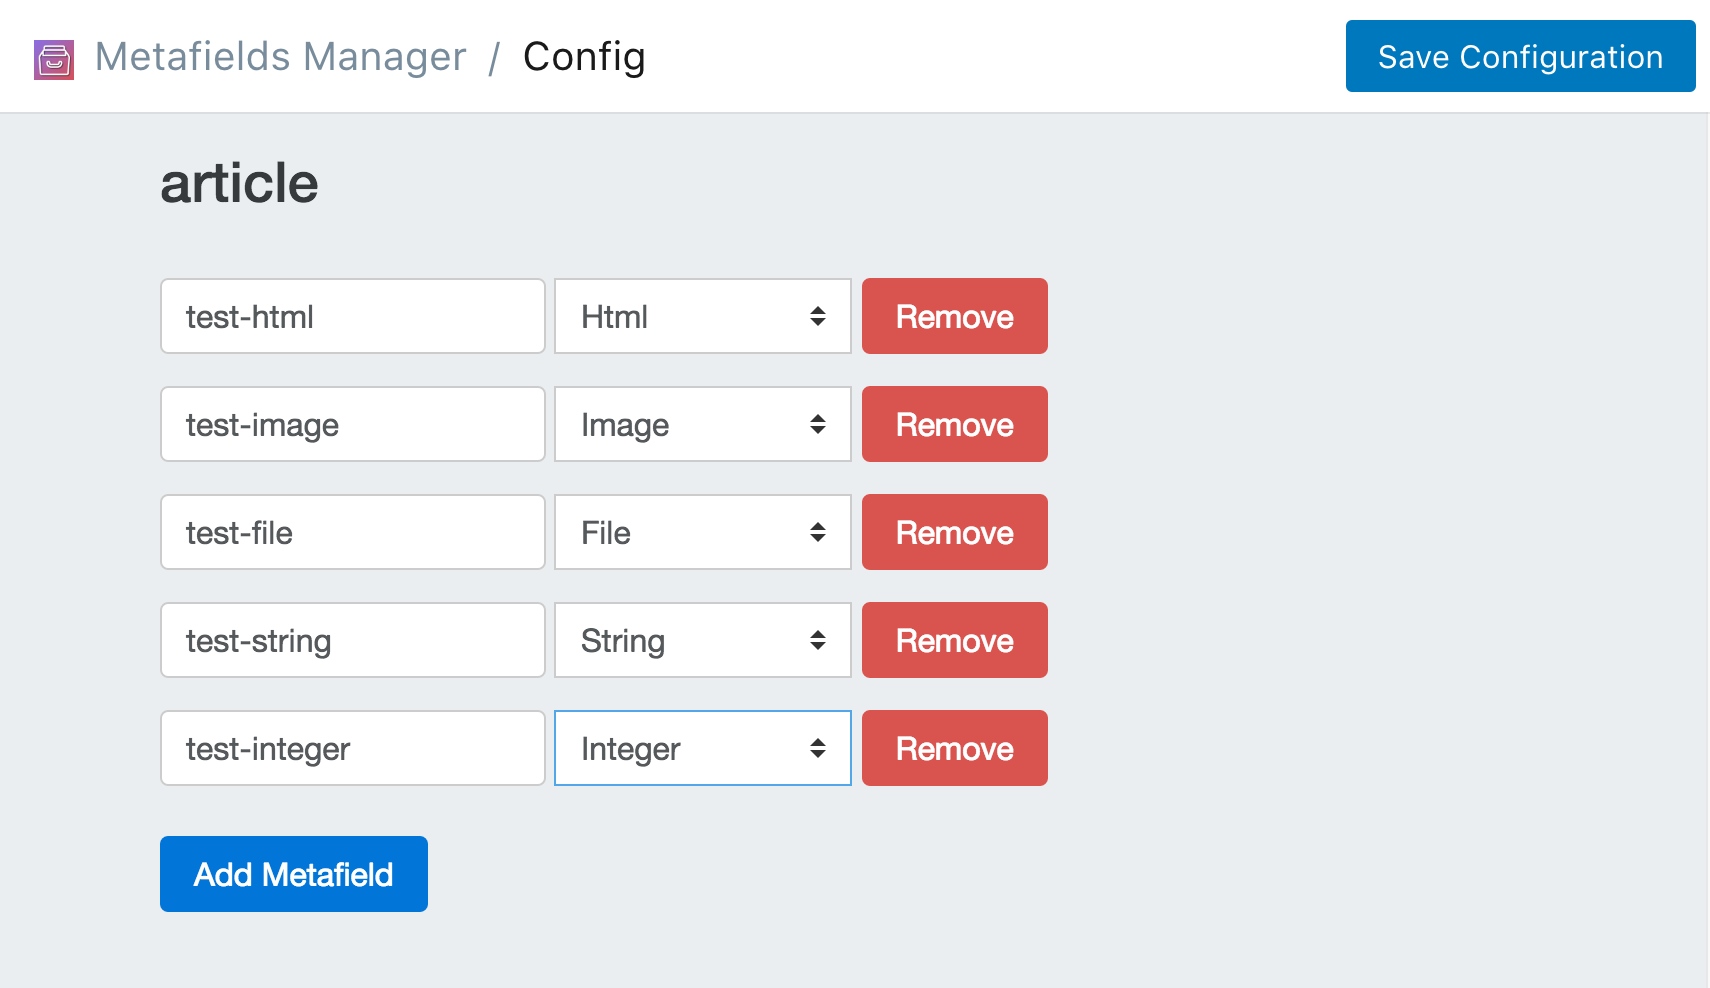
Go to Metafield Configuration and click "Add Metafield" under articles.
Add the following fields:
Your configuration should look like the image below:
Find the article you want to add metafields to. You can do this in 2 different ways.
One way is through the metafields app. Click on Add Metafields. Then select article from the dropdown menu and click Search.
The other way is through the Shopify dashboard. Navigate the article as you normally would through the shopify dashboard (click article find the articles you want to edit and click the link.). Once you're on the article page in the Shopify dashboard, click the "..." button on the top right and select Add Metafields to article.

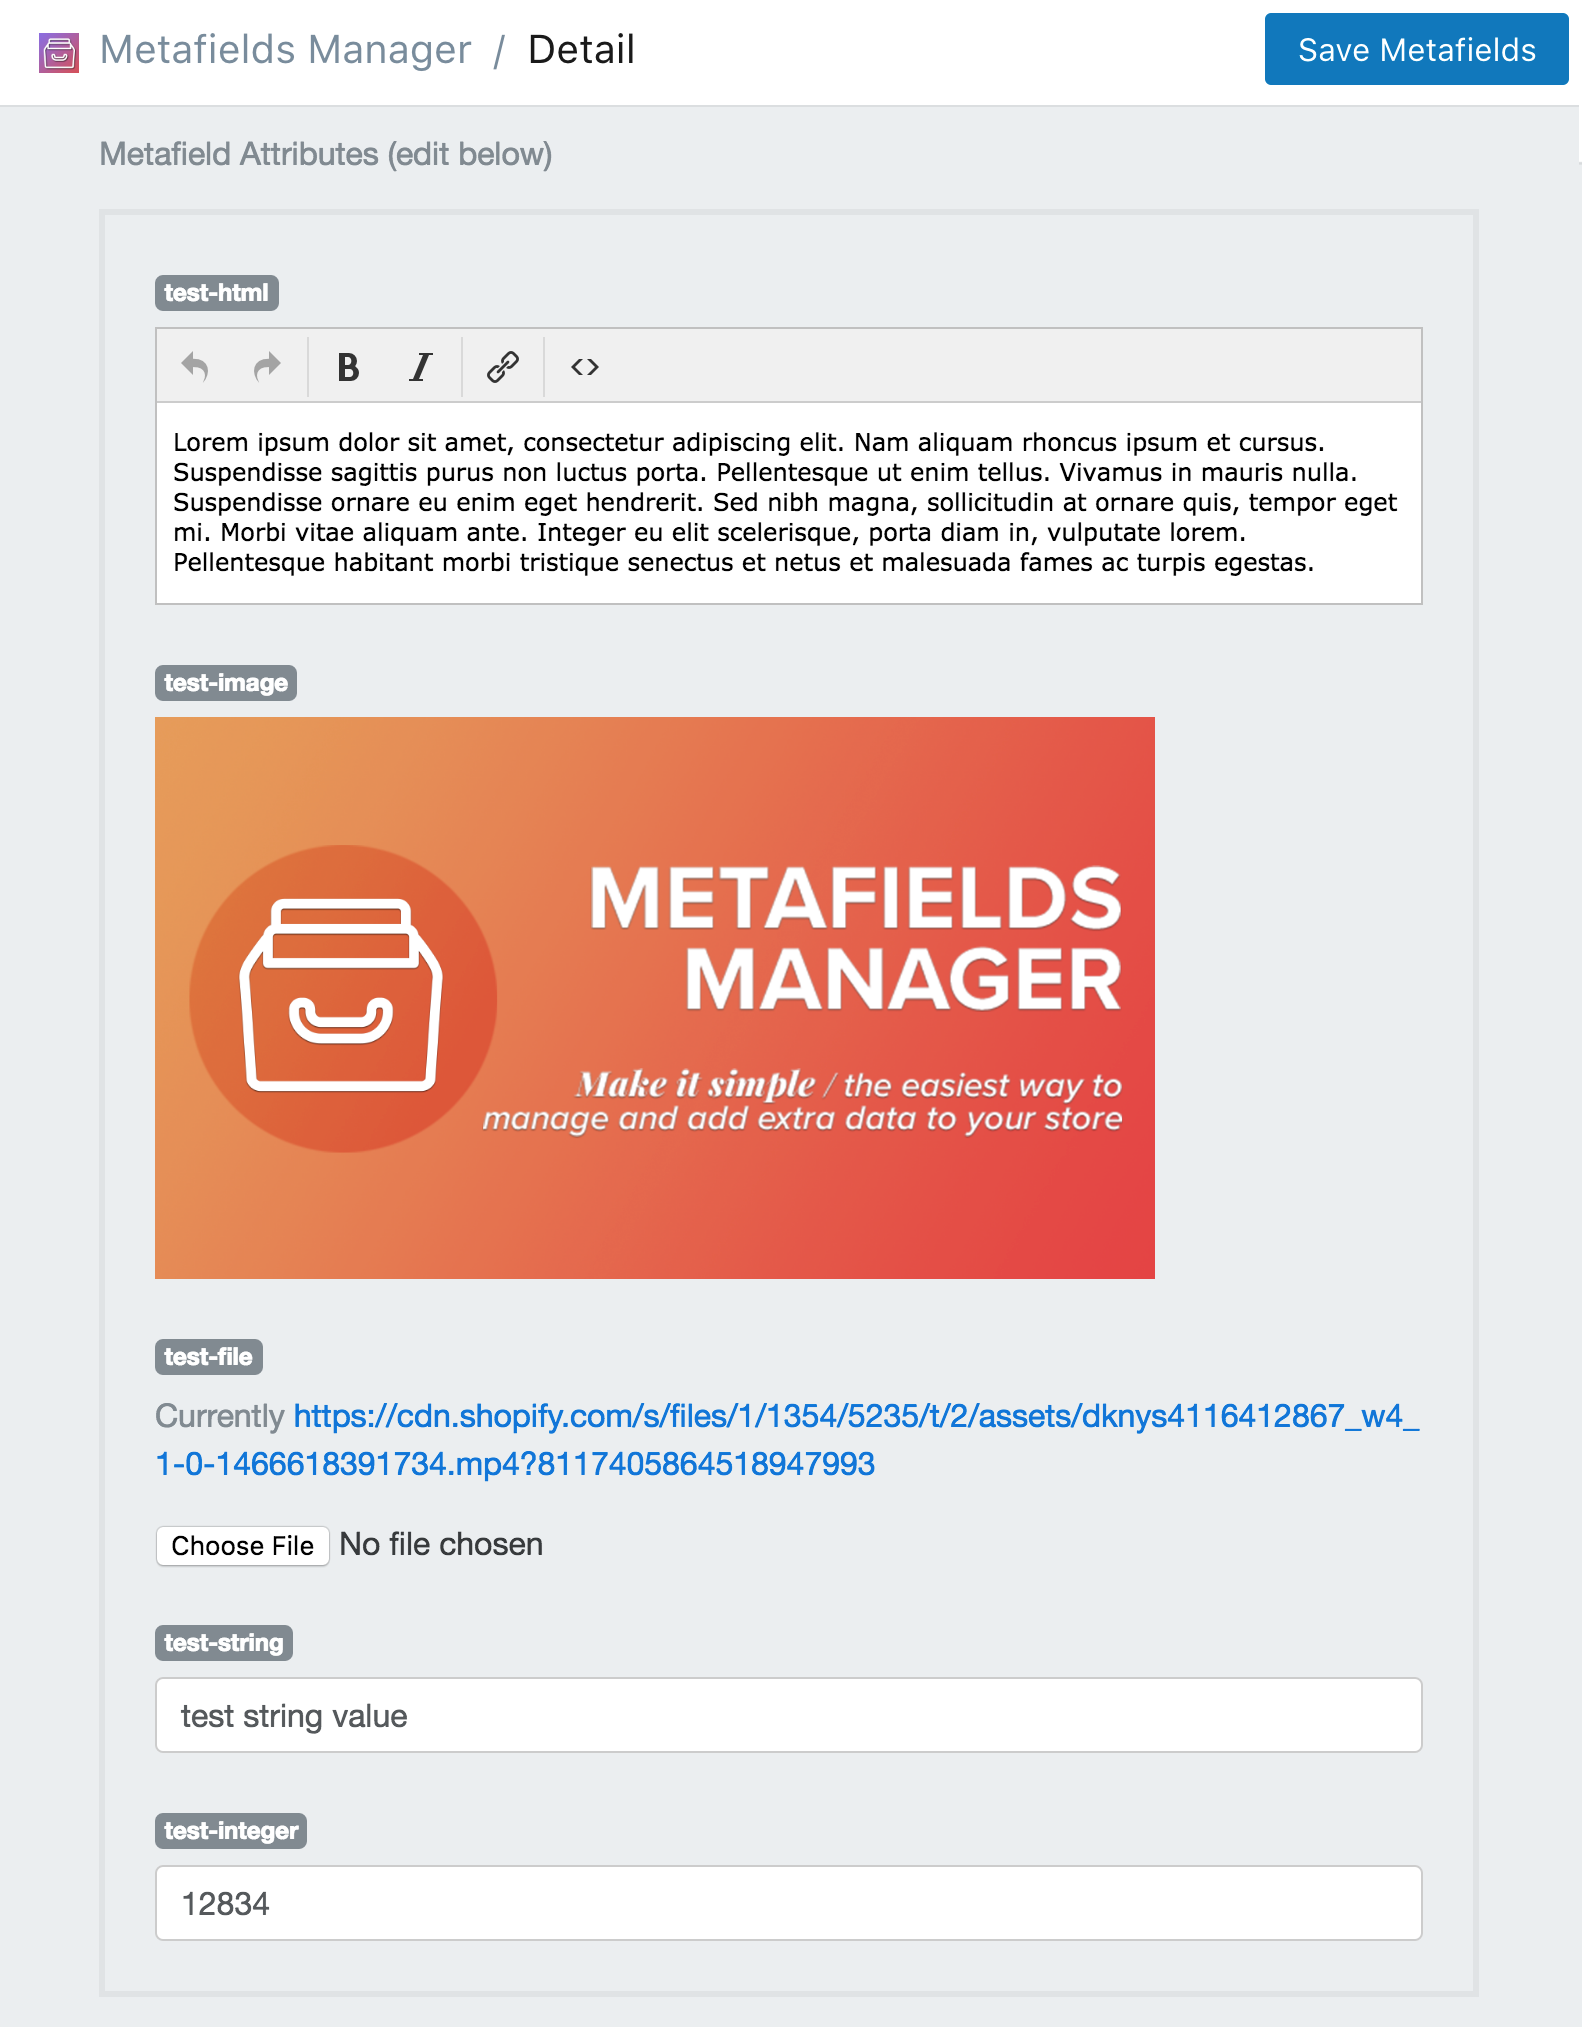
Once you've navigated to the article that you want to add the metafields to, you simply need to fill out the form with your data and then click Save Metafields.
After entering sample data, your article page should look like the image below.
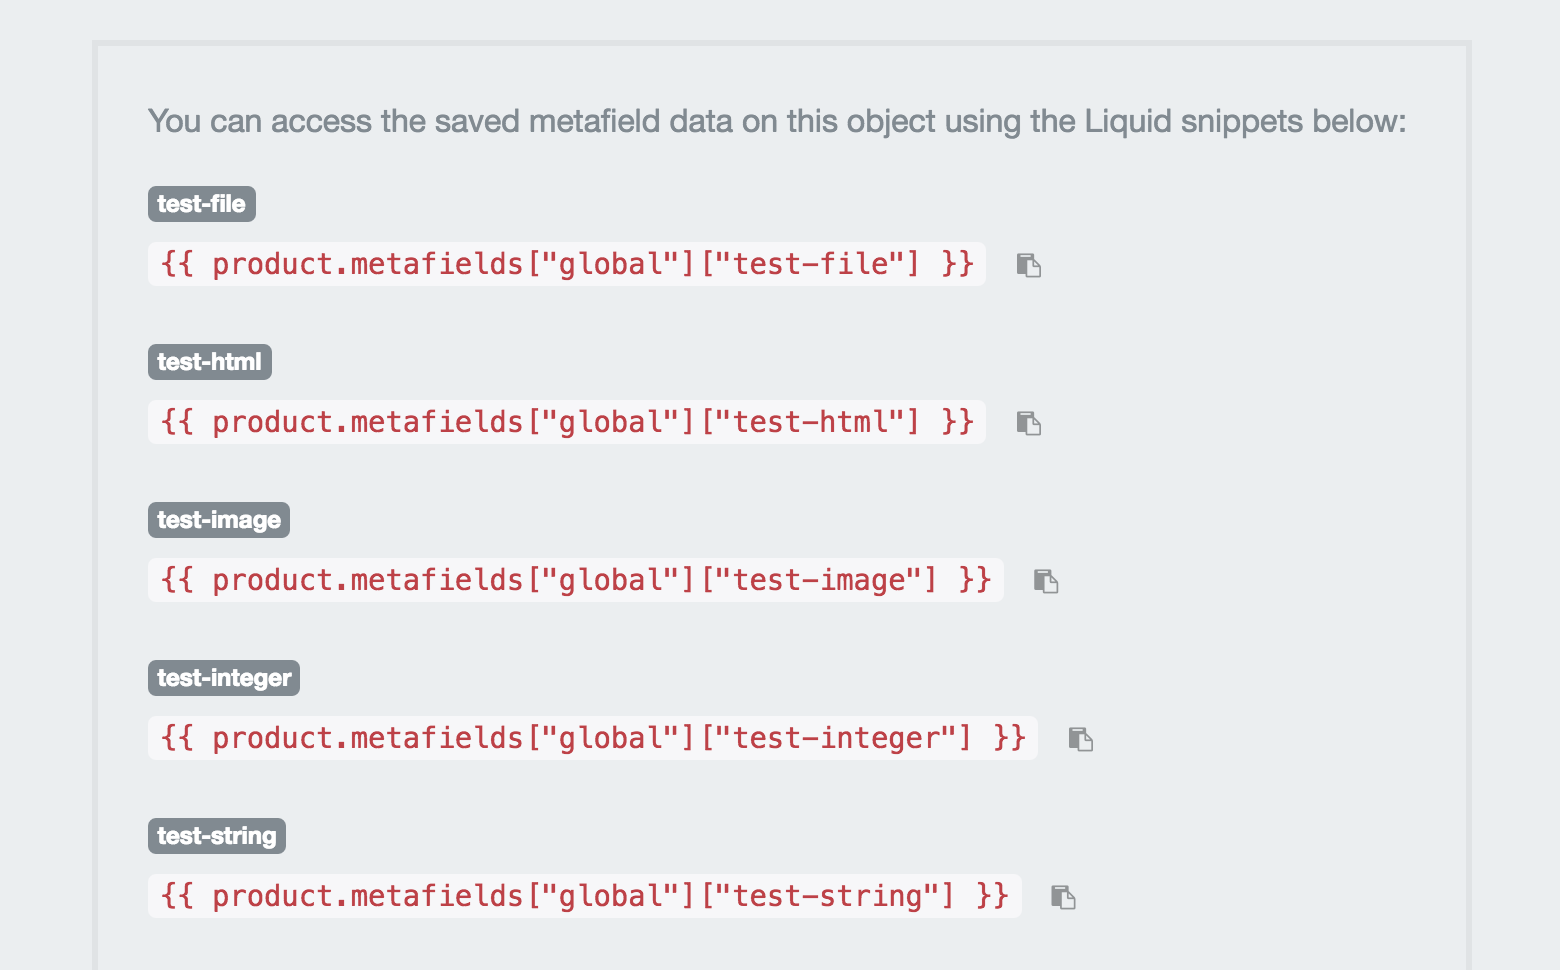
Now that your data is saved to the article, you can access it on your Shopify template by using the .liquid code snippets at the bottom of the page.
Now that you have the data set up. You can create the .liquid snippet that will display the test object. We created an example for you to download here. Be sure to include the snippet on your .liquid template by adding this line:
{% include "mm-metafields" %}
Or view the snippet below: